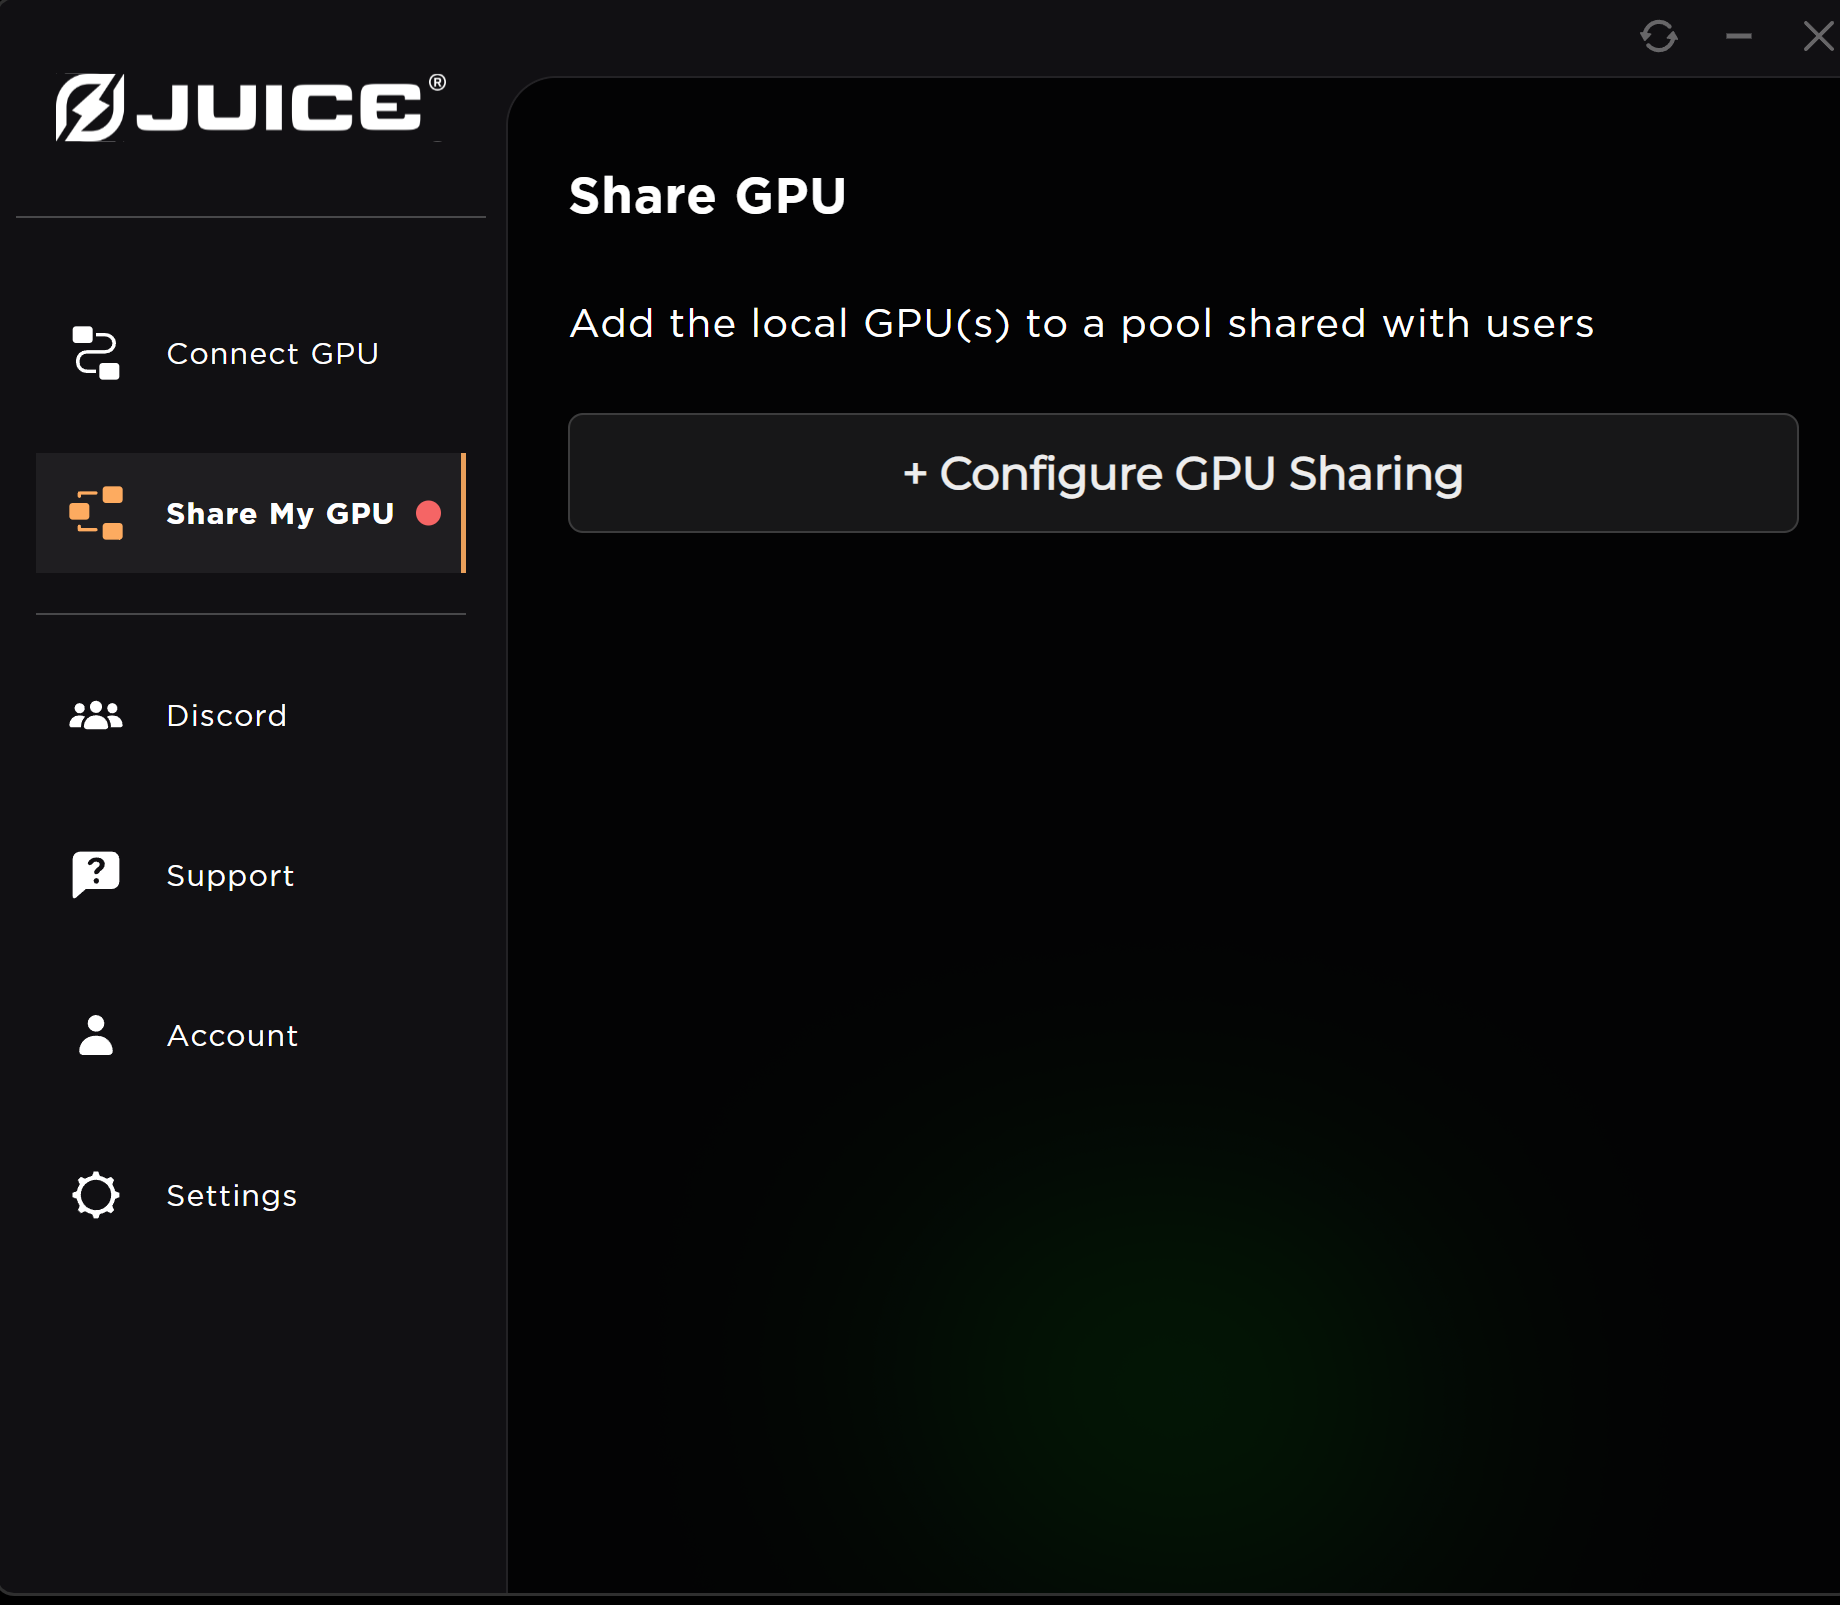
Share My GPU
The Share My GPU section in the Juice Desktop app allows you to contribute your computer's GPU to a shared pool. This makes your GPU's processing power available to other users in an organization, enabling distributed computing tasks.
Getting Started
To begin sharing your GPU, navigate to the Share My GPU tab from the sidebar navigation. If you are not currently sharing any GPUs, you will see an option to begin the configuration process.
-
Initiate Sharing: Click on the + Configure GPU Sharing button to start the process.
-
Select GPU and Pool: A "GPU Selection" window will appear.
- Select GPU(s): Choose the GPU(s) you wish to share from the list. The application will display your available hardware.
- Select a Pool: From the dropdown menu, select the pool to which you want to add your GPU.
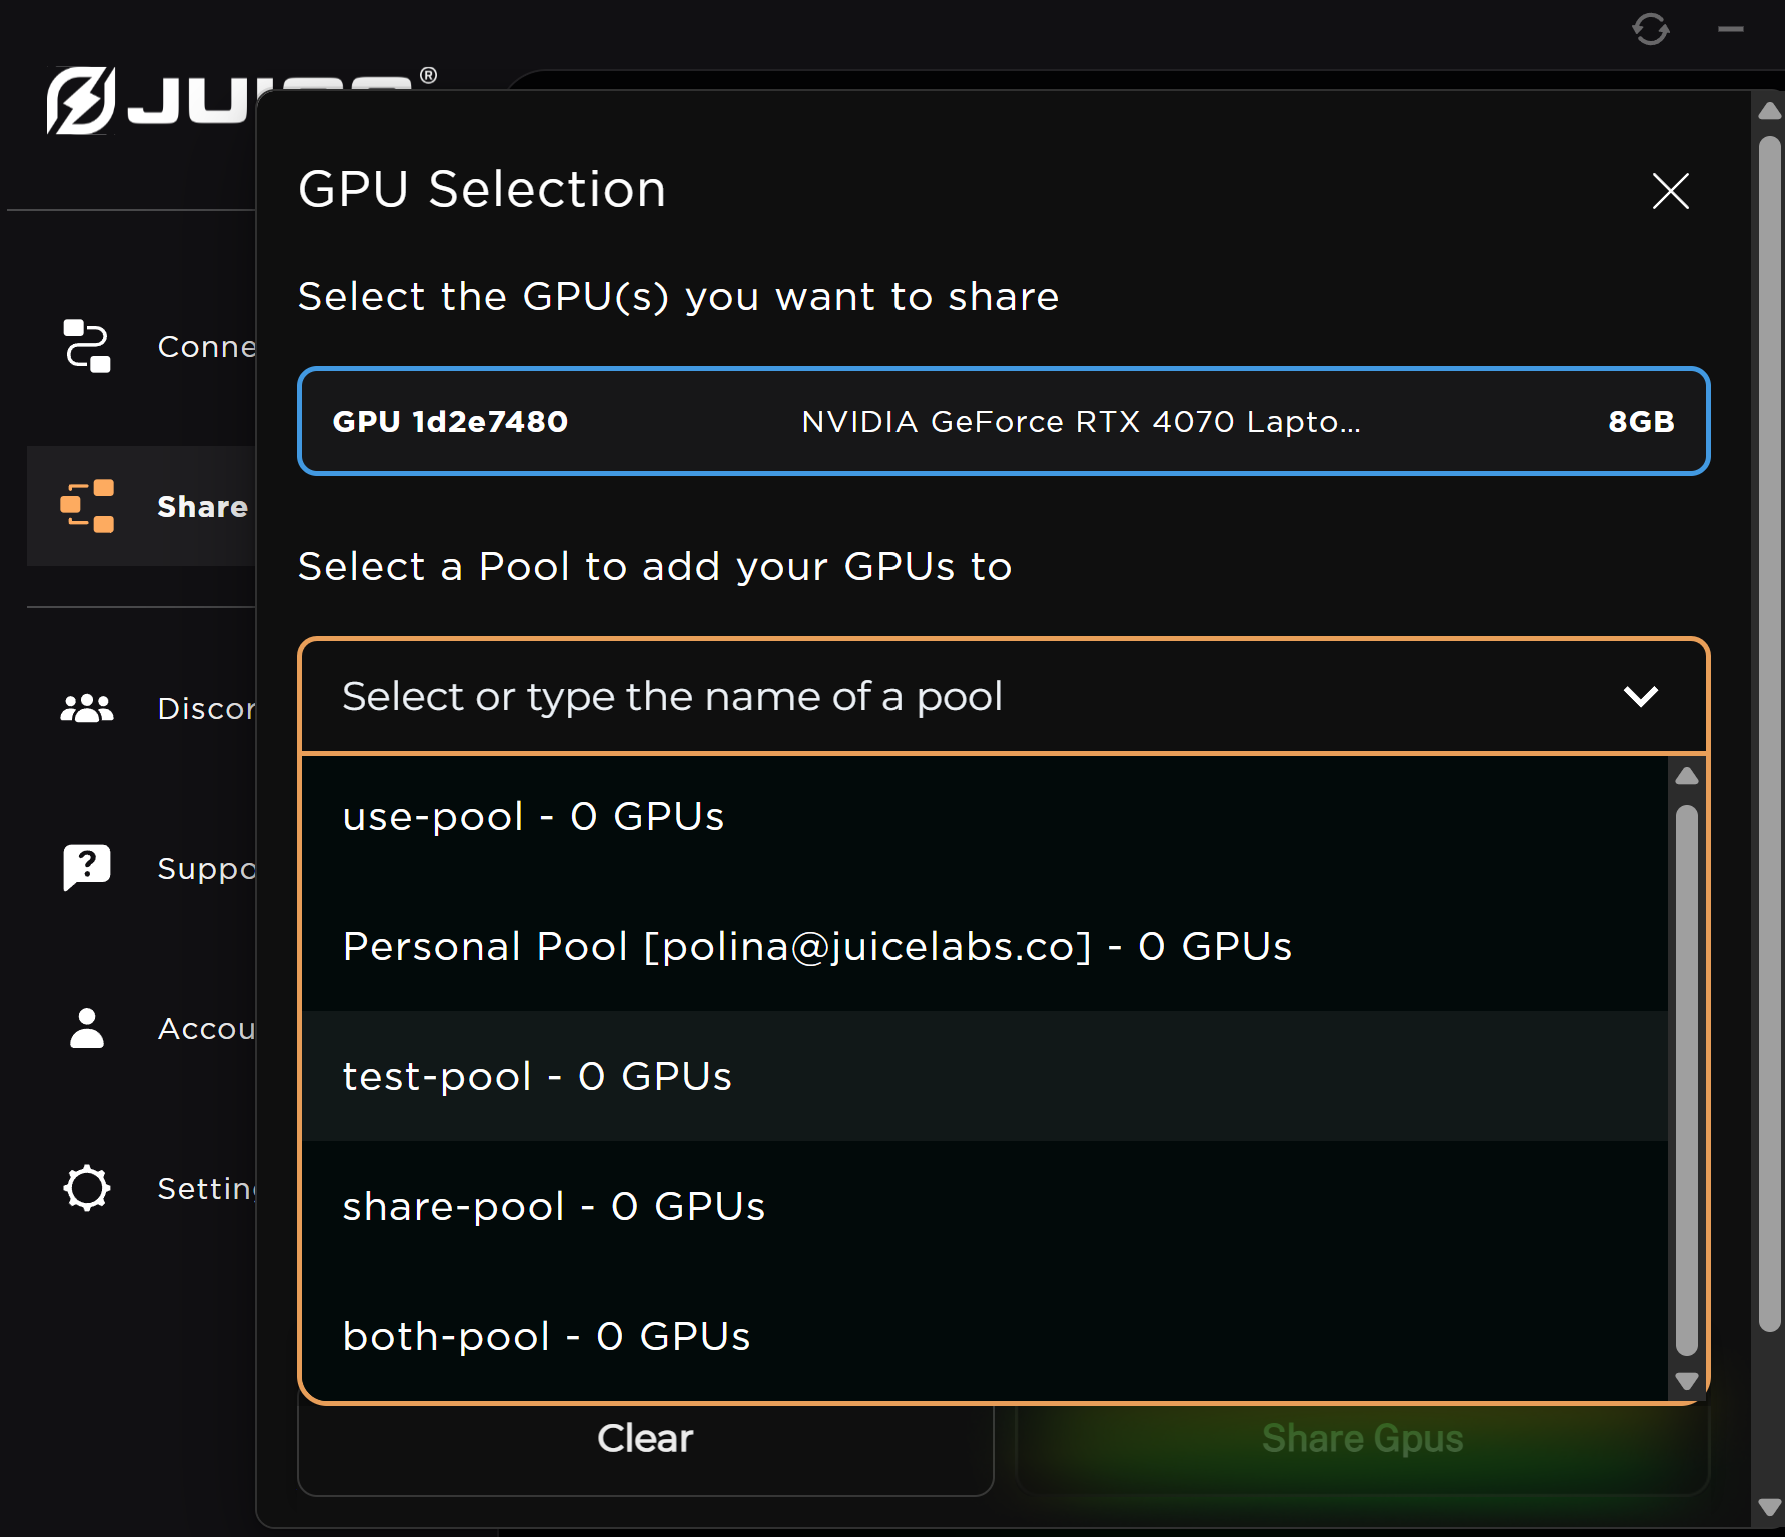
- Confirm Sharing: Once you have made your selections, click the
Share Gpusbutton.
Managing Shared GPUs
After successfully sharing, the main screen will display your Shared GPUs.
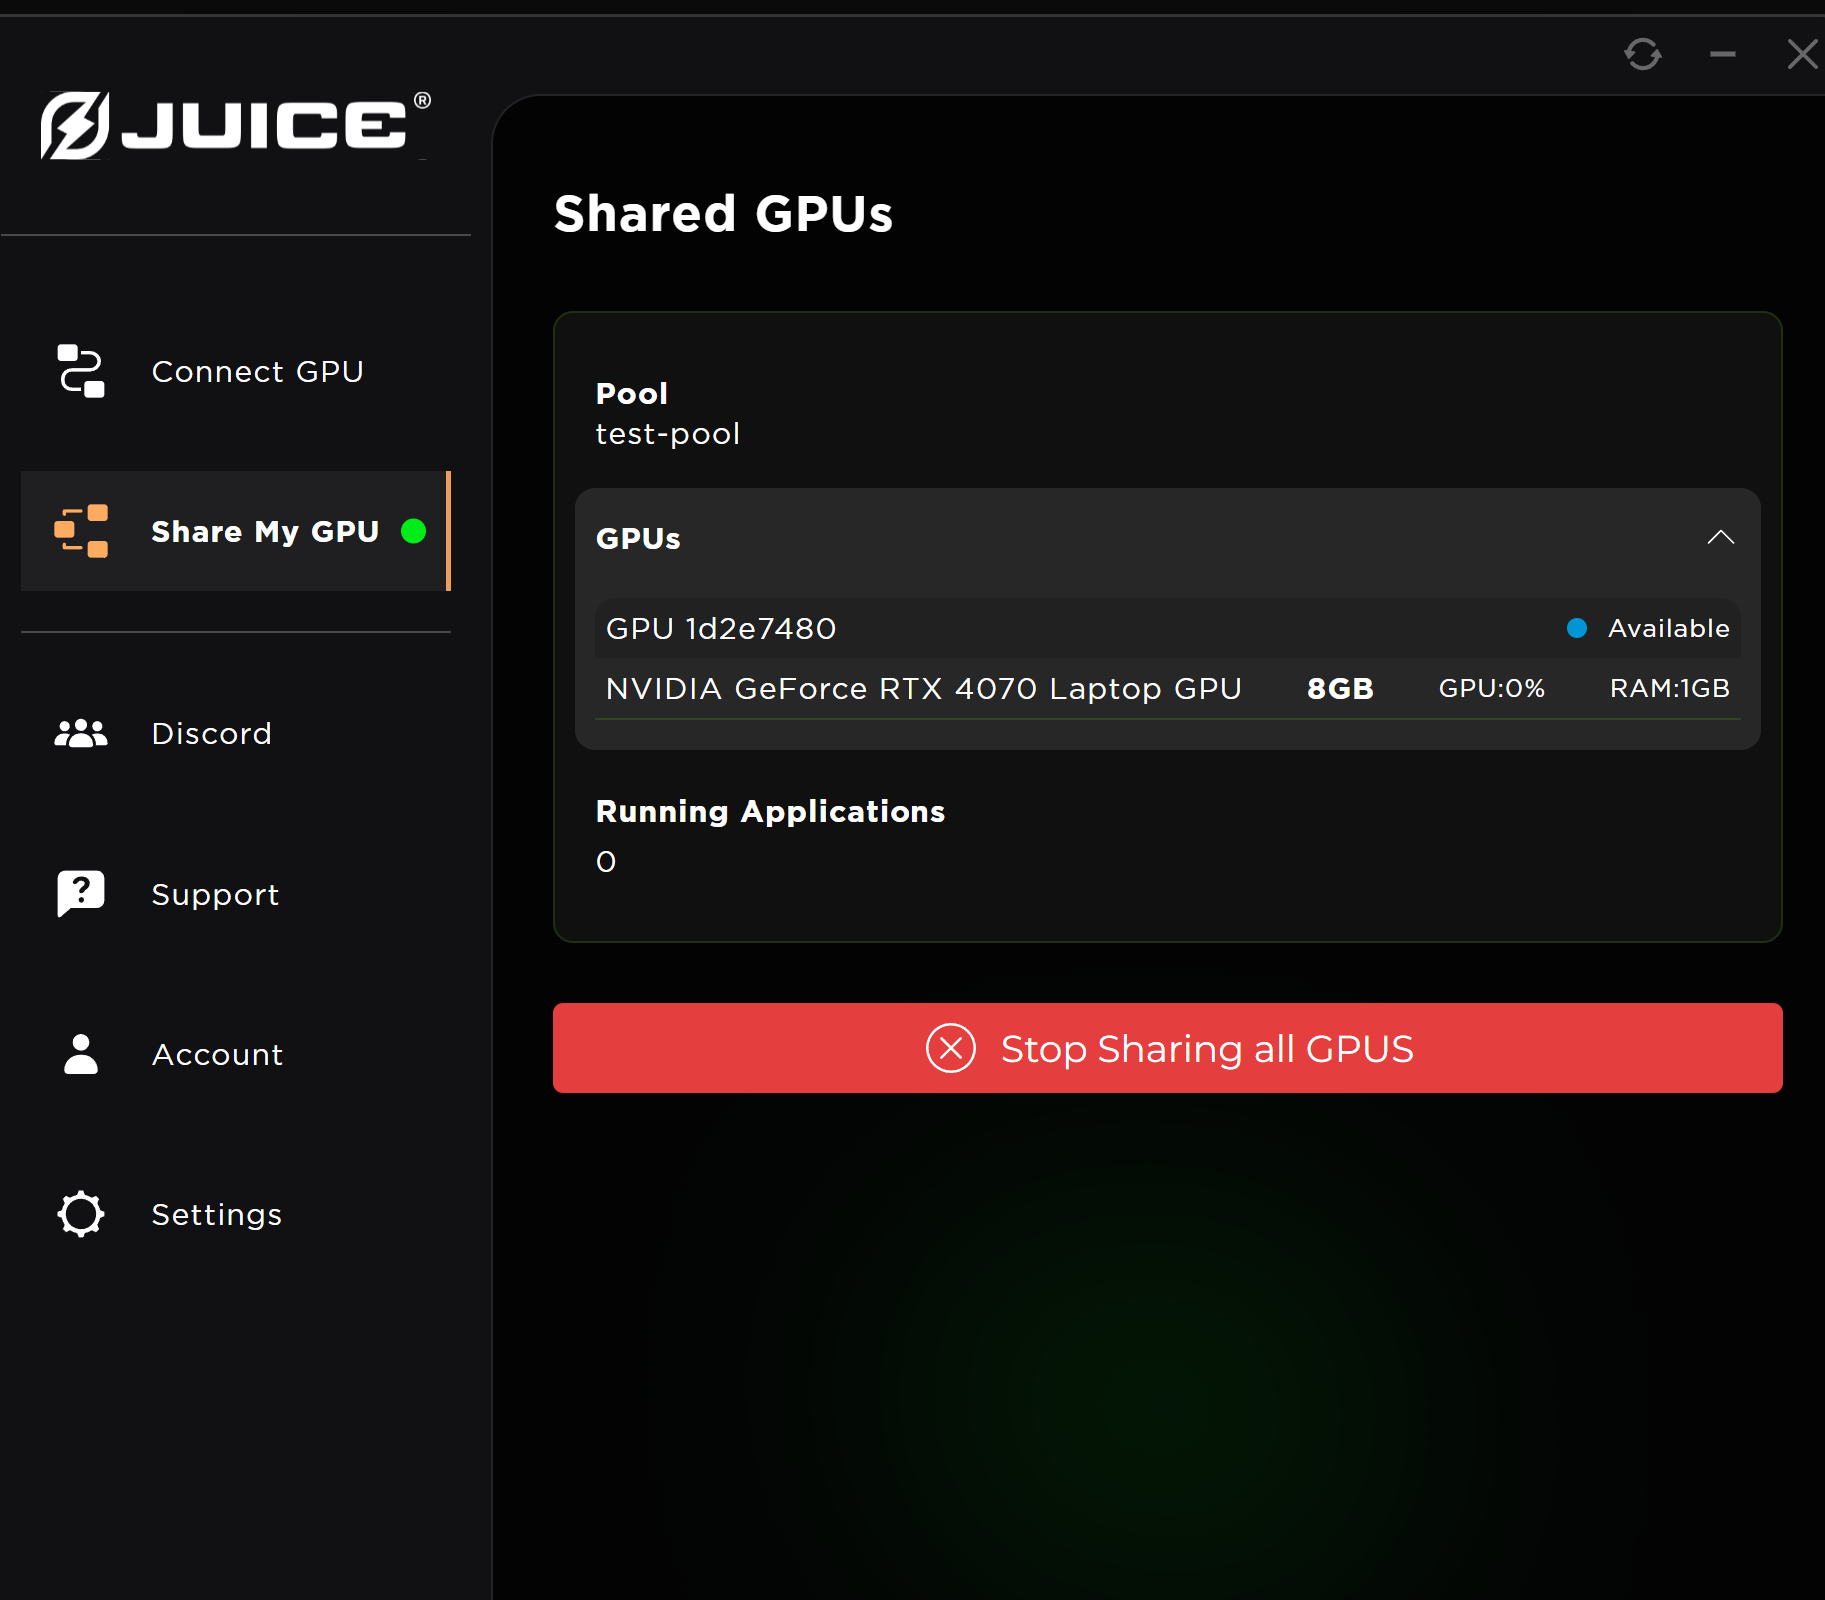
This view provides a summary of your shared GPUs:
- Pool: The name of the pool your GPU is part of (e.g., "test-pool").
- GPUs: A list of your shared GPUs.
- Details for each GPU are shown, including its name, VRAM (e.g., 8GB), current utilization (GPU:0%), and available memory (RAM:1GB).
- An
Availablestatus indicates the GPU is ready for use.
- Running Applications: This section will show any applications currently utilizing your shared GPU.
To stop sharing, simply click the red Stop Sharing all GPUs button.
Help Improve This Page
Found a mistake? Want to contribute? Edit this page on GitHub or explore more editing options.